Blinking an LED
Slides
F for fullscreen · O for overview
Arduino IDE

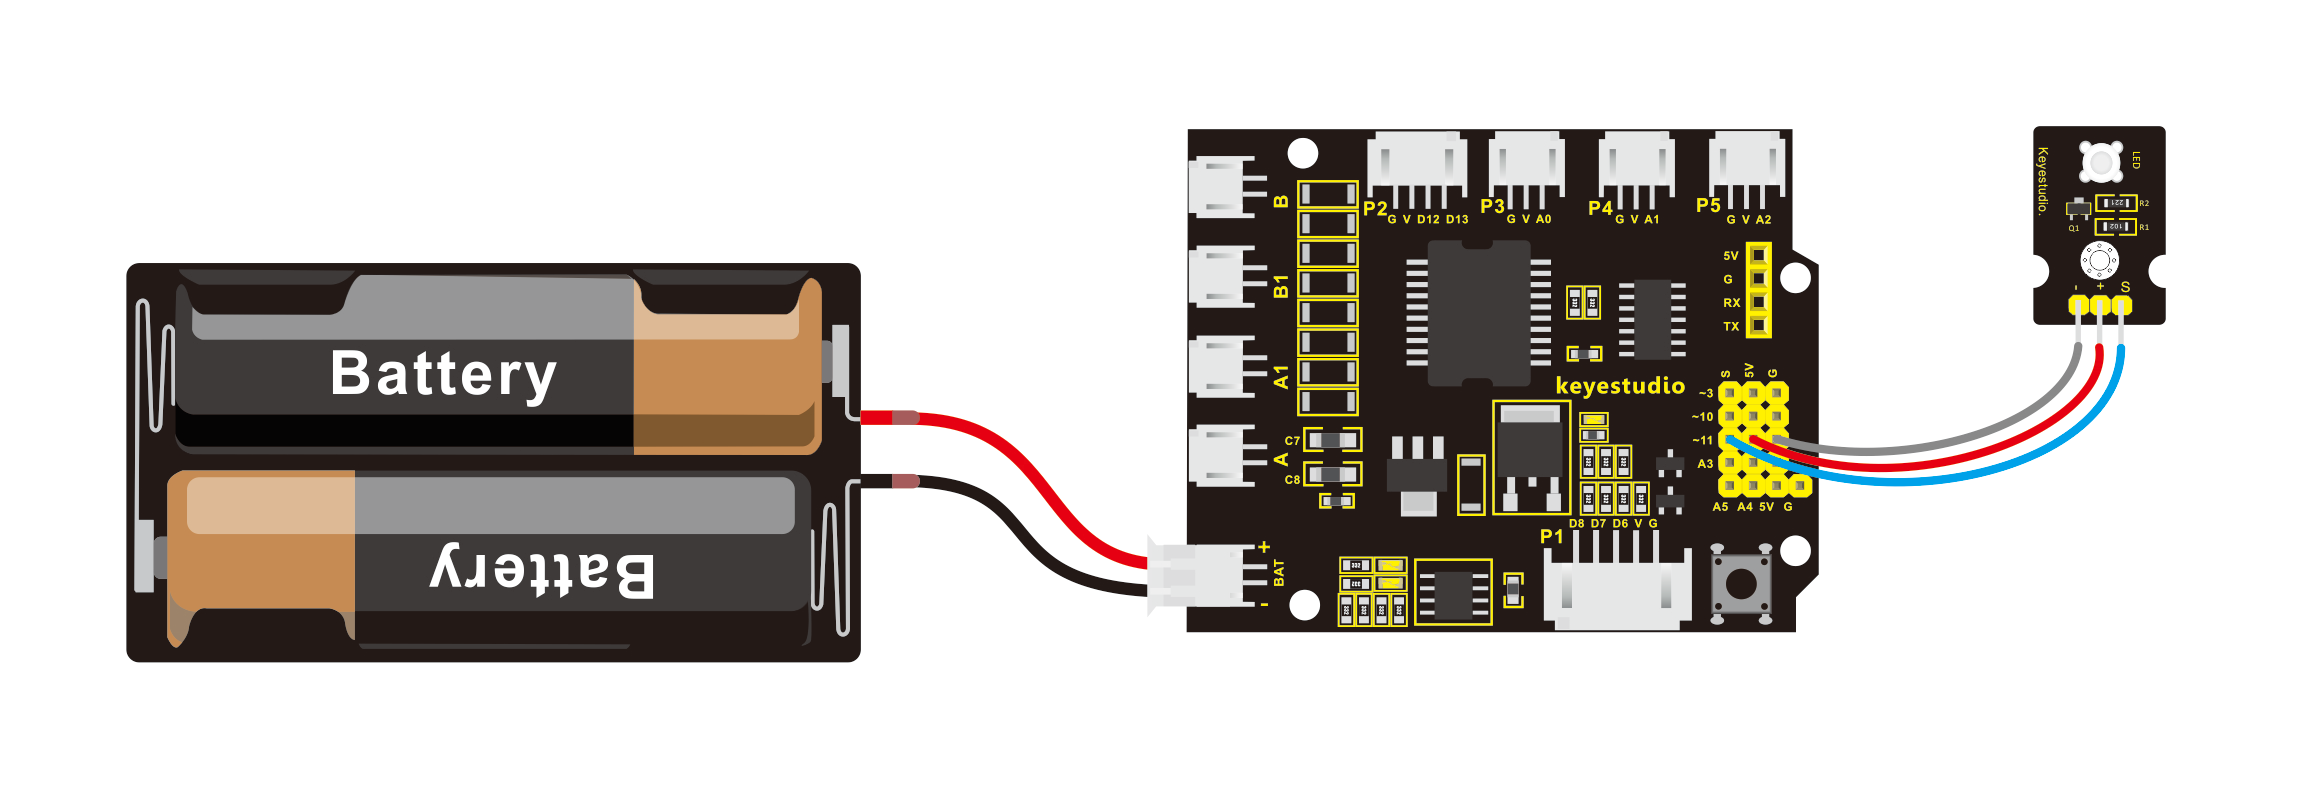
LED on the robot

Make LED blink
- Define a variable
ledpinto be11 - Initialize the
ledpinas output - By sending the HIGH signal, we are giving the LED a high voltage level. Typically for microcontroller, this is 3.3V or 5V.
- The LOW signal gives the LED a low voltage level, which is close or equal to 0V.
- Time delay between two commands. The time is defined with the unit of milliseconds.
Verify and upload the program to the Arduino Uno (the microcontroller of the robot)
Connecting the robot to the computer
Verify COM port

Verify and upload the program
You can use the "verify" button even when you are not connected to a microcontroller to check your code.
After the code is uploaded, you should see the LED blinking at a rate of 1 second of light on and 1 second of light off.
Bring it further
- How do we make the LED blinking at a faster or slower speed?
-
Can we blink the LED with the following pattern?
3 sec on → 1 sec off → 2 sec on → 0.5 sec off → repeat